|
|
|

6" f/8 Criterion EQ | 76mm f/16 Refractor | 8" f/6 Dobsonian |
Astrophotos | Observing | Resources & Links |
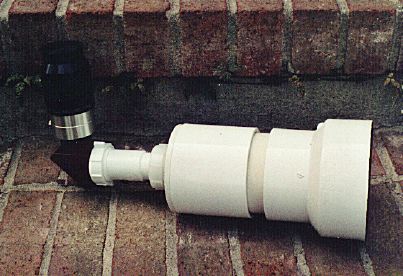
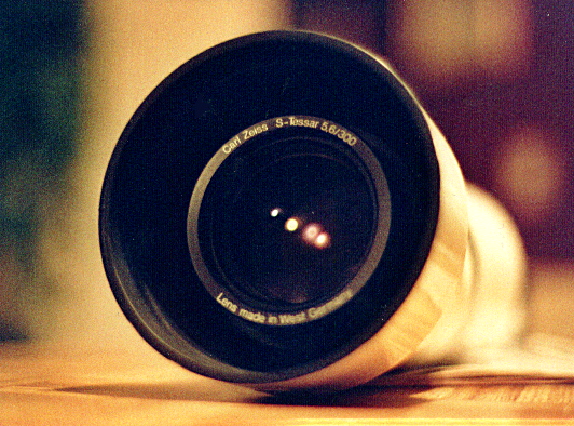
My 3" f/5.6 richest field telescope is of the copyscope variety, which is simply a description of the kind of objective lens in the scope. Most lenses found in copyscopes have been scavenged from broken or outdated copying machines. These lenses are fully functional as telescope objectives and since they are being scavenged, they are rather cheap too! The lens I chose to use for my scope was a Zeiss 300mm f/5.6 Tessar that I purchased through Astromart. While a dedicated copying machine lens would have been cheaper, the quality would not have as top-notch as my Zeiss lens. Once the lens is aquired, the rest of the scope is usually constructed from PVC and other plumbing supplies. Once together you have yourself a very useful scope.
The construction of a copyscope is rather simple and straight forward, even if you have minimal experience with hand tools. The main construction material used is PVC, which is easily found in any plumbing department in home improvement stores. Unless you want to purchase a 10' length of it (since most stores will not cut it any shorter) you might be able to find some scrap pieces elsewhere. However, it is probably just easier to buy the 10' length, since it is cheap enough and you never know when you'll need it. With that in mind, when you head over to the store it would be a good idea to have the objective lens you are planning to use with you. Then you can fit the lens to the PVC pipe which will end up being the tube. PVC is usually sold in 1" increments in diameter; Home Depot, for example, has 2", 3", 4" and 5" inside diameter PVC pipes. As long as your lens fits at least one of these standard sizes you should have no problems. If, however, it does not, you will have to look into one of three things: going with another tube material (such as stove piping, ABS, aluminum tube, etc.), reeming the inside of the PVC tube out if the lens is too big (simply done by sanding out it) or making a reducer-bushing to fit inside the PVC tube if the lens is too small (I have seen people wrap the lens cell with black electrical tape to make up the difference).
Once you have your lens fit to the PVC pipe, you will have to determine how long the tube should be. This in itself can be time consuming since you cannot always go by what might be printed on the lens' cell (a friend of mine had a lens where the focal length was actually 3" longer than what was printed on the cell). The easiest and most straight forward way to accomplish this is to take your copyscope lens in your left hand and hold it at arms-length at eye-height and take the eyepiece you plan to use with the scope and hold it to your eye. Do this standing outside and try to aim for the most distant object, if you can do this at night and use a star or the moon, more power to you! By sliding the main lens towards and away from the eyepiece you should see the image become more or less focused. Once totally focused have someone measure from the back of the main lens' cell to the barrel of the eyepiece. If this was done in the daytime on a distant terrestrial object, then subject about 1/4" from your measurement. On the other hand, if you are doing this at night, the measurement is your focal length.
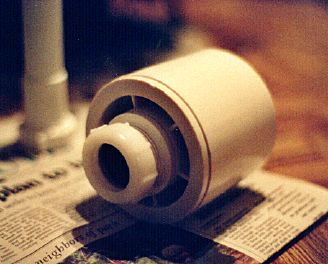
Now you know how long your tube must be in order to focus on night-time objects. Now that you have this measurement, you can go ahead and by the rest of the supplies for the scope. Next, you will need a PVC reducer to bring the back of the PVC down to 1.5" diameter. I know for sure of a 3" to 1.5" PVC reducer, but as for other reducers I'm not sure; you will have to do the shopping. Once you have the back of the scope stopped down to 1.5" you now need a 1.5" to 1.25" reducer. These will usually fit snuggly right into the 1.5" diameter opening in the reducer and have a plastic nut that can be tightened and loosened (this will come in very handy, explained below). The final item needed is a plastic 1.25" draw-tube (they are usually sold 6" in length) that will slid in and out of the 1.25" reducer. As stated above, the nut on the 1.25" reducer will come in handy since when you tighten it it acts as a locking mechanism on the 1.25" drawtube. In actuality you have just created a slide-focuser which is good-enough for a project such as this. Some people have gotten fancy and purchased a 1.25" Crayford focuser and mounted that to the back end of the tube and ditched the 1.25" reducer and just keep the 3" to 1.5" reducer. It's all a matter of preference and depends on who is using the scope.
Once you have all this purchased you can put the scope together. Remember, though, that with all the reducers on the back of the tube, the PVC tube will not be the length of the measurement you took of the focal length. On my scope, the reducers added an extra 1.5" to the back of the tube; therefore I shortened the tube by 1.5" to make up for that. With all this mind, you can put the scope together, without gluing anything just yet of course, and test-drive it at night to make sure everything works correctly. After that is determined, some PVC cement can be used to glue all the components together and into place. For attaching the lens and cell to the tube, I prefer to use black silicone just incase I ever need to remove the lens. However, prior to placing the lens into the tube, the inside of the PVC and reducers should be painted flat black. I used Rustoleum Flat-Black and would suggest that over any other brand's flat-black. Allow that to dry and then silicone the lens into place and you are set! It may seem like a lot but for my father and I it took us two and a half hours on a Sunday afternoon to complete it.
The performance of a little scope like this is admirable. Not only does it work, but you made it yourself! With my particular setup, I get a 5.5degree field of view with my 32mm Plossl eyepiece at 9x. Such a wide field is great to have handy while panning the Milky Way under dark skies. Furthermore, very large objects such as M31 (the Great Andromeda Galaxy) and M45 (the Seven Sisters) fit extremely nice in the field, something that isn't usually possibly with larger aperture newtonians. Despite the scope's excellent performance at low power, it excells and really stands on it's own at high power (43x with a 7 Nagler). Most images in copyscopes will degrade considerably by pushing the scope that far. However, the Zeiss lens I came across has superb color-correction and very little coma. Both abberations may be found when using standard copying machine lenses, but they will not be unbearable.
Looking back on this project, it was definitely worth-while since it came out so good. Few people really understand how simple a project like this is and how rewarding it is when complete. I was a little skeptical since the lens was so small (roughly only 2.5" in diameter), but it still gathers a decent amount of light and the wide field is great to have and compliments a large aperture newtonian nicely. So much so that my plans for my copyscope include totally finishing it off (painting the mounting strap I purchased for it, etc.) and then mounting it as a finder on my 12.5" Dobsonian. So if you have an extra two hours on a Sunday afternoon and you are looking for something to do, follow these instructions and make yourself a scope in a day!


